Its a guide to make your own crosshair and how to use them in Gunz..
Materials needed:A Brain
Adobe Photoshop
A crosshair idea.
Process:Step 1Create a new file. Since I'm making an average sized crosshair, I'd need lots of room, so I'm going with 100pixels by 100pixels in size. You can also give it a name ahead of time with the top input bar. I put in "Crosshair Tutorial". Also check to make sure the "Background Contents" dropdown menu is set to "Transparent", the Color Mode RGB, resolution 72px, and if you're using filters, use 8-bit mode. For this tutorial, it doesn't really matter much.
 Step 2
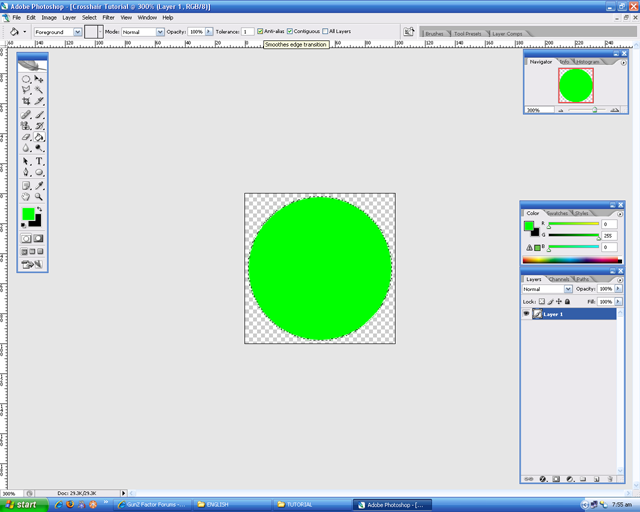
It's easier to work when your workspace is zoomed in, I prefer ~300-500%, depending on how much detail I'm putting into it. For this, let's do 300%.

Select the Elliptical Marquee tool from the tool menu. (right-click the select tool for types)

Draw a circle by holding the left shift key and dragging in the workspace. The shift key makes the ellipse automatically stick to being a circle. Same goes for the rectangle making it a square. Repeating again will try to add in a selection, so we don't want that.

Pick a color (I chose green) and use the fill tool to fill in the selection. If you want it to blur the edges to blend them with the bg, make sure anti-alias is enabled.
 Step 3:
Grab the ellipse marquee tool again (or press the 'M' key) and select an inner circle so we can see inside the crosshair. Press the delete key to delete the selection.
 Step 4:
At this point, I'm making the aiming point for the crosshair so I need to make a new layer. If you've never messed with photoshop's settings before, it should be the keystroke Ctrl+Shift+N. Or, you can just click the menu Layer>New>Layer... and then Ok. At this point, I've named my layers by double clicking on their text on the layers window. I've also made a black BG layer and placed it under the other layers so that it's the BG so I can see what I'm creating now. We can delete this layer or set it's visibility to 0% later on.
What you need to do now is play around with the selection tool or even use the line shape tool and draw the aiming part. I called this layer the Crosshair layer, and I took the Rectangular Marquee tool and selected a cross shape. I then used the Gradient Fill tool (right-clicked the Fill tool) and used the Diamond Gradient along with holding down shift to make a perfect square gradient. To make this transparent, click the dropdown at top of the gradient color type and click the 2nd one.

Now draw the gradient starting from the exact center (easy to find if you're zoomed) and drag to the inner edge of the outer ring while holding shift to keep it straight. It should end up looking similar to this:
 Step 5:
You may have already noticed that this crosshair looks pretty big when at 100%, so we're going to have to down-size it. You can do this simply by clicking on the top menu bar Image> Image Size... or by pressing Ctrl+Alt+I. Set the size to 50x50. I have "Constrain Proportions" clicked so I only have to change one of them, and then PS automatically calculates the proportional size for the image.

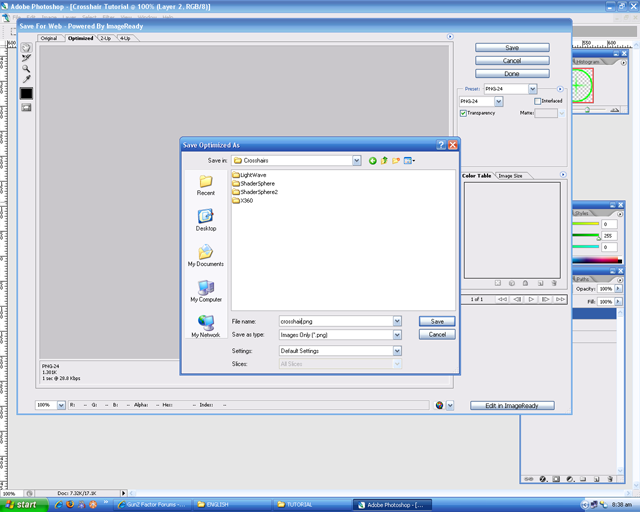
You can now delete the BG layer or click the eye next to it to make it dissappear thus hiding the layer. You're also ready to save the file. Click either on File>Save for Web... or press Ctrl+Alt+Shift+S. This will bring you to the saving window and you want to pick PNG-24 with Transparency checked. Click save and save it to a folder. If you want to save it directly to your ijji Gunz crosshair folder, save this unaimed crosshair as "crosshair.png" in the folder "C:\ijji\ENGLISH\Gunz\CUSTOM\CROSSHAIR". I don't know how many times I've seen posts about "WHERE DO I PUT THESE CROSSHAIRS?".
 Step 6:
At this point, you've made your unaimed crosshair and you're ready to make an aimed one. This is easy. Just click the layer you want to change the color of and then click the (ƒ) button and click "Color Overlay...". The "..." means there's a dialogue box coming up. We're going to use the default red color that is overlayed when we click the overlay box. Just go ahead and click OK and do the same for the outer ring layer if you want to change that to red too.

Go ahead and save this as "crosshair_pick.png" the same way you did the first one.

You're done. Just place them in the folder "C:\ijji\ENGLISH\Gunz\CUSTOM\CROSSHAIR" and start ijji Gunz. In the options menu, click "Misc" and then click the crosshair dropdown choosing "Custom".